Champagne Gel Nail Polish for New Year's Nail Art
As the year draws to a close and the countdown to a new beginning begins, there's no better way to usher in the New Year than with a touch of glamour and sophistication. Enter champagne gel nail polish – a shimmering and versatile choice that encapsulates the festive spirit. In this exploration, we'll delve into the world of champagne gel nail polish, exploring its characteristics, the myriad New Year's nail art designs it complements, and a step-by-step guide on how to achieve a flawless champagne gel manicure.
Champagne Gel Nail Polish: A Radiant Elegance
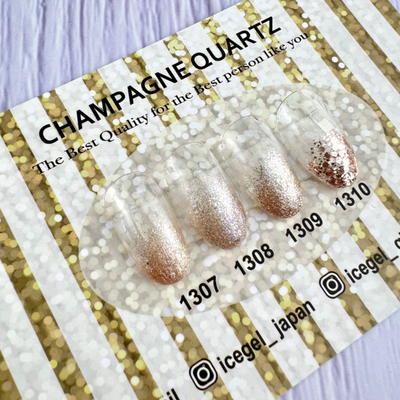
Champagne gel nail polish is a unique and sophisticated shade that captures the effervescence and opulence of its namesake beverage. This versatile color features a neutral base with subtle hints of gold and silver shimmer, creating a timeless and elegant look. The beauty of champagne gel polish lies in its ability to seamlessly complement a variety of skin tones while adding a touch of glamour to any occasion.
New Year's Nail Art: A Festive Canvas for Champagne Gel Polish
-
Classic Glitter Fade: Start with a clear or nude base coat and apply champagne gel polish towards the tips of your nails. As you move towards the cuticle, gradually blend the color, creating a glitter fade effect. This classic design mirrors the sparkling effervescence of champagne bubbles and exudes sophistication.
-
Countdown Confetti: Begin with a champagne base and add colorful confetti accents using gel polish in vibrant shades like gold, silver, and black. These celebratory confetti dots represent the excitement of counting down to the New Year and create a playful and festive look.
-
Midnight Sky Ombré: Create a captivating ombré effect using champagne gel polish as the base and transitioning to a deep, midnight blue or black at the tips. Add silver or gold glitter near the transition point to mimic the stars in a New Year's Eve sky. This design captures the magic of the midnight hour.
-
Champagne Bubbles: Embrace the fizzy, effervescent nature of champagne by incorporating small bubble-like designs using silver or gold gel polish. Against a champagne base, these bubbly accents add a touch of whimsy and charm to your New Year's nails.
-
Golden Fireworks Burst: Craft a dazzling display of fireworks using gold gel polish on a champagne base. Create bursts of light and color using a fine brush or nail art pen, capturing the vibrant energy and excitement of fireworks that light up the sky during New Year's celebrations.
How to Achieve a Flawless Champagne Gel Manicure
Now that we've explored some captivating New Year's nail art ideas, let's delve into the step-by-step process of achieving a flawless champagne gel manicure:
-
Prepare Your Nails: Start by ensuring your nails are clean, trimmed, and free of any old polish. Use a gentle nail file to shape your nails to your desired length and style.
-
Apply Base Coat: Begin with a clear base coat to protect your natural nails and promote a smooth surface for the gel polish application. Allow the base coat to dry completely before moving on to the next step.
-
Apply Champagne Gel Polish: Apply a thin layer of champagne gel polish to each nail, ensuring even coverage. For a more vibrant look, you may apply a second coat after the first one has cured. Cure each coat under a UV or LED lamp according to the manufacturer's instructions.
-
Create Nail Art Designs: Once the base color is set, unleash your creativity by adding the chosen New Year's nail art design using complementary gel polish colors. Use fine brushes, dotting tools, or nail art pens to achieve precision in your designs.
-
Cure the Nail Art Designs: After completing your nail art, cure the entire manicure under the UV or LED lamp to set the designs in place. Ensure each layer is fully cured to prevent smudging or chipping.
-
Apply Top Coat: Seal your New Year's nail art with a clear gel top coat. This not only adds a glossy finish but also provides durability and protection to your designs. Cure the top coat under the lamp to achieve a long-lasting and resilient finish.
-
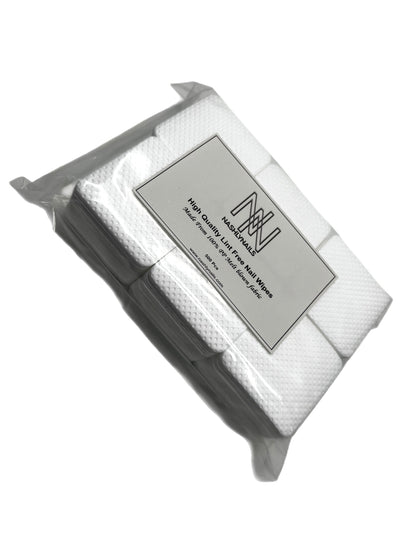
Cleanse and Moisturize: Once your manicure is complete, use a lint-free nail wipe or cotton pad with rubbing alcohol to cleanse the sticky residue (if any) left by the gel polish. Finish by moisturizing your hands and cuticles to keep your skin nourished.
Tips for Long-Lasting Champagne Gel Nails
To ensure your champagne gel nails last throughout the New Year's festivities, consider the following tips:
-
Quality Gel Products: Invest in high-quality gel nail products from reputable brands to achieve a professional finish and lasting results.
-
Proper Application: Follow the manufacturer's instructions for each gel product, including curing times and application techniques, to ensure proper adhesion and longevity.
-
Avoid Water Exposure: Minimize prolonged exposure to water, especially in the first few hours after the manicure. This helps the gel polish cure fully and enhances its durability.
-
Protect Your Nails: Wear gloves when engaging in activities that may cause damage to your nails, such as cleaning or gardening, to protect the integrity of your manicure.
-
Regular Maintenance: Perform regular touch-ups as needed to fix any minor chips or imperfections, maintaining the overall appearance of your champagne gel manicure.
Champagne gel nail polish opens the door to a world of elegant and festive nail art, perfect for ringing in the New Year with style and flair. Whether you opt for a classic glitter fade, confetti celebration, midnight sky ombré, champagne bubbles, or golden fireworks burst, champagne gel polish serves as the perfect canvas for creating a memorable and sophisticated manicure. By following the step-by-step guide and incorporating the suggested tips, you can achieve a flawless and long-lasting champagne gel manicure that sparkles and shines, just like the joyous moments of the New Year's celebration. Cheers to a beautiful start and a year filled with dazzling nail art!
Quantity: 9ML
-Easy to work with
-Cures in LED/UV
-Goes on smooth
1308, 1309, 1310, 1311
Magnet not included


